Hexies! Hexies! Hexies!
What's not to love? Even though I fell in love with EPP through 60 degree diamonds, once I started to hex seriously, I found that they're so
soothing. When basted to templates, they are perfectly contained little morsels of my favorite fabrics, portable, pleasing, playful..
Today is my day on the
12 Hexies Blog Hop and I've got a little tutorial for how to make a pin cushion with just 8 hexagons. Though this is my tutorial, I can't take credit for coming up with the shape/pattern of the pin cushion. I actually saw it on flickr ages ago, and in the comments of that pic, the poster referenced another blog post that she was inspired by. Really folks, it's 8 hexies joined together.. there are only so many ways to do it. But they go together so nicely and you can turn them into a really substantial pin cushion, so let's have a go at it--
First cut and baste your hexies. I'm using 3 5/8" squares on 1 1/2" paper hexagon templates. There are lots of great places to learn how to baste, if you don't have
my book, check out
this online tutorial.
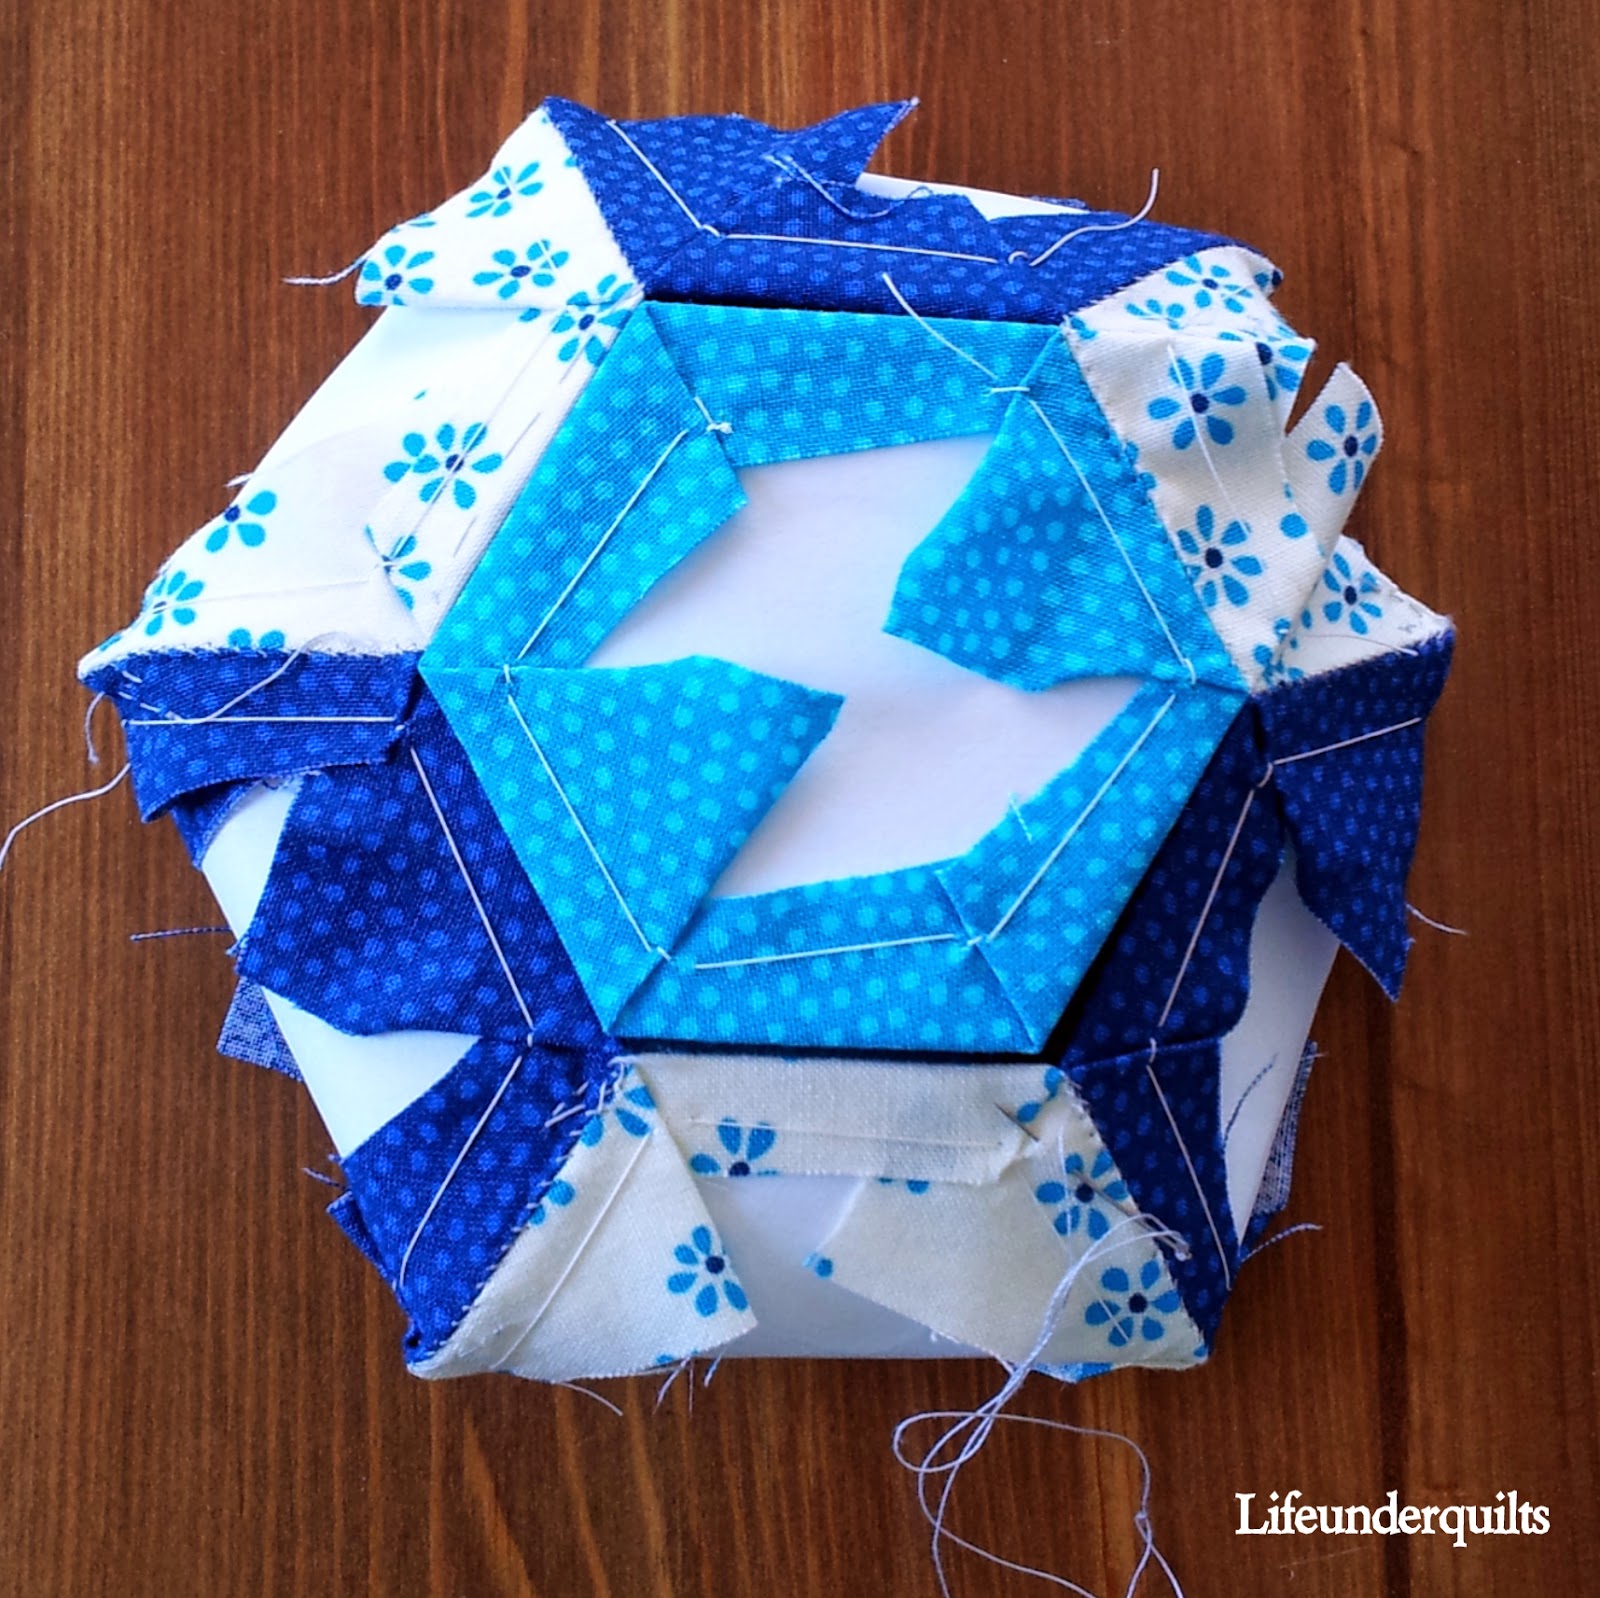
Join the first 7 hexies into a rosette. I tend to go around adding one "petal" at a time, then backtracking through the seam allowance to get back to the corner so I can join the new petal to the center.
 |
| I travel through the seam allowance on the back to get to another corner so I can continue sewing without cutting my thread. |
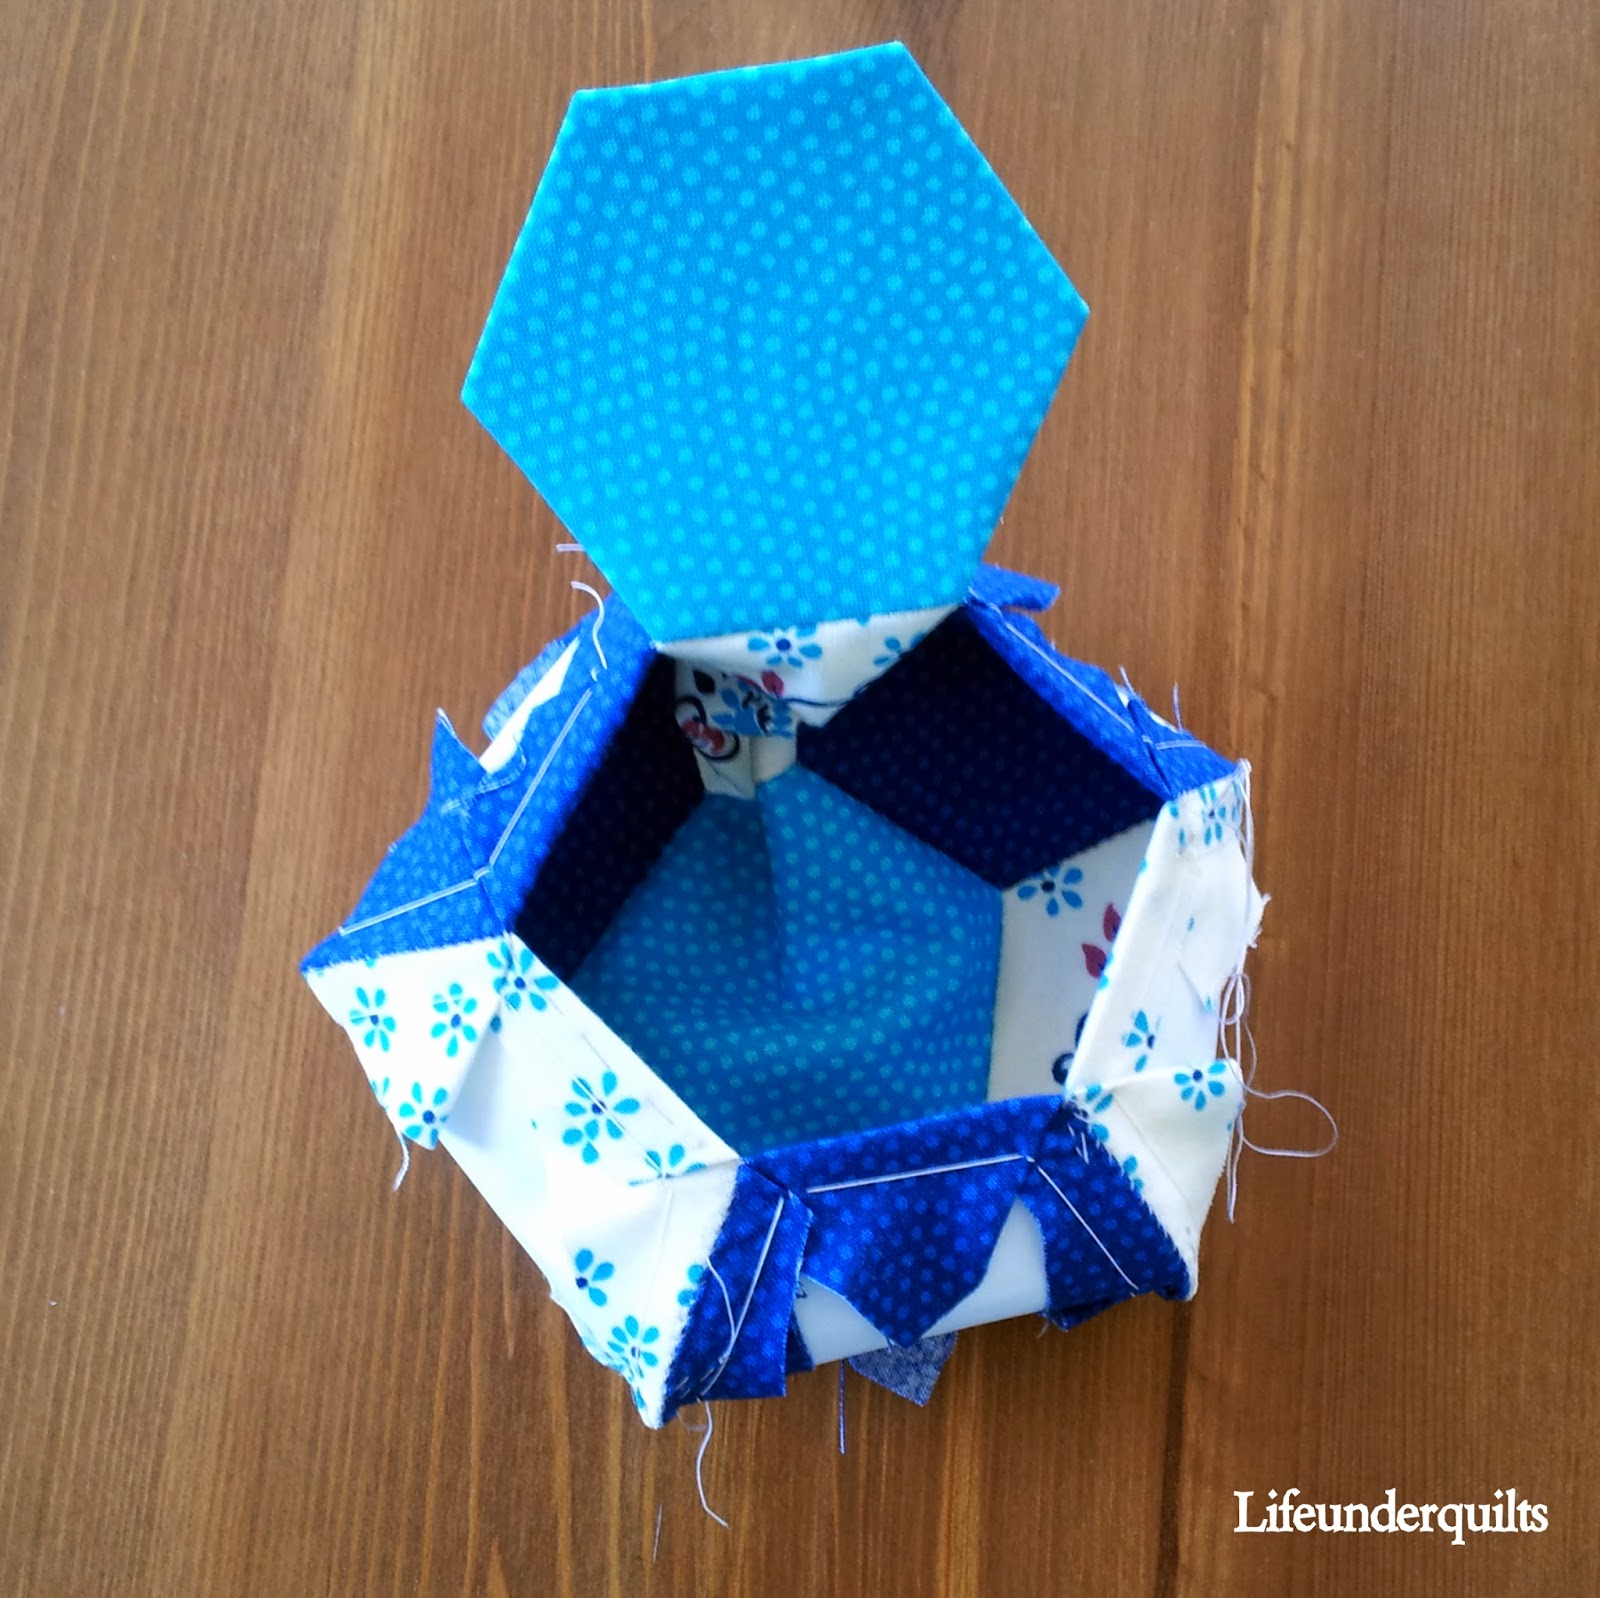
Next start sewing the petals to each other, making the whole piece curve into a bowl.
Then add the last hexie to the "bottom". When you're down to the last two seams, remove the last of the templates and whipstitch carefully along the edge. Before you get all the way around, you'll need to flip the piece right side out.
Before you complete that last seam, insert a funnel in the hole and fill the pin cushion with crushed walnut shells. You can get them at some quilt shops and most large pet supply stores (they are sold as reptile bedding).
Carefully stitch up the last part of the seam and smoosh it around until the corners have popped out and the filling is evenly distributed. Then find two nice buttons and some thick thread.
Tie a knot in the thread and push it through the center of the pin cushion and up through the first button. Come back down and catch the second button, covering up the knot on the bottom. Go through each button a few more times (3? 4?) then make a knot and bury it.
Thanks for stopping by my post on the blog hop! If you make one of these pin cushions, I'd love to see it! And don't forget to visit the rest of the blogs on the 12 Hexie Hop!


Very cute and so well explained! Well done!
ReplyDeleteThis is really cute! I was making pincushions a different way but now I am going to re-think them and try your way. Thank you for sharing!
ReplyDeleteNever thought about using crushed walnut shells for filling. What is the advantage of this over just using fiberfill?
ReplyDeleteI read that the crushed nut shells work to sharpen the needles when you stick them in!
DeleteI just got a 25 lb box of ground walnuts ...and this is going to be perfect for my Christmas love tokens!!!
ReplyDeleteLove this! I'd never thought about folding a GFG block into a bowl in this way. Brilliant!
ReplyDeleteIt looks great and feels like a different effect with hexies as they're folded over.
ReplyDeletelove this idea, thanks for the heads up!
ReplyDeleteCan't wait to try this. Hope mine will be as charming as yours!
ReplyDeleteLove this idea. Thanks for sharing. x
ReplyDeleteSo fun! Thanks! I have a few hexies made somewhere. I might just dig them up and make a pincushion. :)
ReplyDeleteI made one of these pincushions a few weeks back after I saw a picture in one of your posts. I just finished stuffing it yesterday. :) They really are fun and cute. Alas, I have no means for attaching photos.
ReplyDeleteWhat a great idea for a blog hop - and some lovely projects!
ReplyDeletethis was my first-ever EPP, turned out not so bad! photo here:
Deletehttps://www.flickr.com/photos/liz92b/20417096075/in/album-72157656570038599/