Showing posts with label blogtour. Show all posts

Thursday, July 24, 2014

12 Hexies Blog Hop!!

Hexies!  Hexies!  Hexies!
12 Hexie Blog Hop Button-200.jpg

What's not to love?  Even though I fell in love with EPP through 60 degree diamonds, once I started to hex seriously, I found that they're so soothing.  When basted to templates, they are perfectly contained little morsels of my favorite fabrics, portable, pleasing, playful..

Today is my day on the 12 Hexies Blog Hop and I've got a little tutorial for how to make a pin cushion with just 8 hexagons.  Though this is my tutorial, I can't take credit for coming up with the shape/pattern of the pin cushion.  I actually saw it on flickr ages ago, and in the comments of that pic, the poster referenced another blog post that she was inspired by.  Really folks, it's 8 hexies joined together.. there are only so many ways to do it.  But they go together so nicely and you can turn them into a really substantial pin cushion, so let's have a go at it--
First cut and baste your hexies.  I'm using 3 5/8" squares on 1 1/2" paper hexagon templates.  There are lots of great places to learn how to baste, if you don't have my book, check out this online tutorial.

Join the first 7 hexies into a rosette.  I tend to go around adding one "petal" at a time, then backtracking through the seam allowance to get back to the corner so I can join the new petal to the center.

I travel through the seam allowance on the back to get to another corner so I can continue sewing without cutting my thread.
Next start sewing the petals to each other, making the whole piece curve into a bowl.

Then add the last hexie to the "bottom".   When you're down to the last two seams, remove the last of the templates and whipstitch carefully along the edge.  Before you get all the way around, you'll need to flip the piece right side out.


Before you complete that last seam, insert a funnel in the hole and fill the pin cushion with crushed walnut shells.  You can get them at some quilt shops and most large pet supply stores (they are sold as reptile bedding).
Carefully stitch up the last part of the seam and smoosh it around until the corners have popped out and the filling is evenly distributed.  Then find two nice buttons and some thick thread.

 Tie a knot in the thread and push it through the center of the pin cushion and up through the first button.  Come back down and catch the second button, covering up the knot on the bottom.  Go through each button a few more times (3? 4?) then make a knot and bury it.


Thanks for stopping by my post on the blog hop!  If you make one of these pin cushions, I'd love to see it!  And don't forget to visit the rest of the blogs on the 12 Hexie Hop!


Monday, January 13, 2014

Dreaming of Stars Blog tour!


What makes blenders so great?  It's got to be the color.  The deep saturated color, so versatile, so inviting.  DREAM, the new line of blenders for Timeless Treasures, is just that.  And tiny dots?  Oh, I'm in love with the tiny dots!

Timeless Treasures asked us to design a 12" star block.  I used Shannon's No-waste Geese tutorial to make a Sawtooth Star on the outside, and put a wonky log cabin in the center, what do you think?

Want to make this block?  Here are the steps:
1.  Cut  (1) 7.25" square of your background fabric and (4) 3 7/8" squares for your star points.  Follow Shannon's tutorial to make flying geese for the star points.
2. Cut (4) 3.5" squares of your background fabric for the 4 corners of the block.
3. Cut strips ranging from 1.5"-2" of all fabrics except the background.
4.  Construct a wonky log cabin (I like this tutorial from Ellison Lane) and square it up to 6.5"
5.  Lay out your patches and piece them together in rows.  Press seams of top and bottom sections towards corner blocks.  Press seams on the center section towards the log cabin.

6.  Join the rows, press, and admire!

Timeless Treasures is giving away 1/2 yd of EACH Dream color I used in this block to one lucky blog reader.  (Taupe, Berry, Citrus, Grass, Teal and Royal).  To enter, just comment on this post with your favorite quilt block pattern of the moment.  I will choose a winner next Monday, 1/20.  Make sure I have a way to contact you if you win~

Please check out all the blogs on the tour this week to see the full collection of DREAM fabrics and all the star blocks~

Monday, January 13- Jessica Alexandrakis (You're Here!) - http://lifeunderquilts.blogspot.com/

Tuesday, January 14- Kim Brackett - http://magnoliabayquilts.blogspot.com/

Wednesday, January 15- Nicole Daksiewicz - http://modernhandcraft.com/

Thursday, January 16- John Kubiniec - http://bigrigquilting.blogspot.com/

Friday, January 17- Kimberly Einmo - http://www.kimberlyeinmo.com/blog/ 
And don't forget to head over to SewTimeless on the 17th for a giveaway of a FQ bundle of the whole collection (30 pcs, totaling 7 1/2 yards!)

Thursday, September 26, 2013

First Steps to FMQ-- Blog Tour & Giveaway

Do you quilt your own quilts?  The last quilt I hand quilted (start to finish) was George's baby quilt, finished in early 2009.  Then I sent one to a long-armer, and by late 2009, I was ready to give machine quilting a try.  Even though I read a lot of blogs about machine quilting, it was still a rough, bumpy event.
1994 Detail (2009)
We still use that quilt, but I have learned a lot since.  A year or so later, I tried out wavy vertical lines with my walking foot, and that somehow became my 'go to' pattern for any quilt I needed quilted quickly.  It's great, I still do it, but I can't really fairly say "Yes, I machine quilt my quilts."  Come on, I've got one pattern.
Well, it's time to break out of that one pattern rut and start playing..


My friend Christina has written a book and asked me to help get the word out.  When I got my copy I was so excited--                                     'Oh wow!  I love this!'
  'I have that fabric!'
                        'This looks so cool'
         'I love her photography!'

And I'm like, "sure!  I can promote your book!  I quilt!"  I flipped through the book and instantly wanted to make about 6 of the projects.  I thought it'd be nice to make one to show off for the blog hop.  The construction was simple, so I got started-- pieced the top, layered and spray basted.. and then..

Um.  No.  

I got too scared to quilt it.  Because, no, I really didn't know how (or I should say I didn't feel comfortable) to free motion quilt.

That's when I shelved my blind enthusiasm and opened First Steps to Free Motion Quilting as a guide book, with the intent of learning a new skill.  And wow, it worked.  There is so much information in this book, all neatly organized, easy to understand, with clear directions that are easy to follow.  If you read her blog, you know that Christina has always made machine quilting look easy, but now we know how she does it. ;)

I started with some practice pads and I worked on the patterns I have always wanted to try.

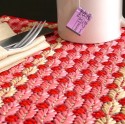
I used some left over Mile-a-Minute blocks and turned them into coasters.  I tried vines, pebbles, echoing paisleys, and spirals.  Some of my lines looked good, some were crap, but what mattered was that I was no longer scared of doing it.  I know with practice I'll get better.
I also started doodling patterns -- I used the magnetic doodle board lying in the play room, easy to draw and erase, no worries about the kids messing it up.

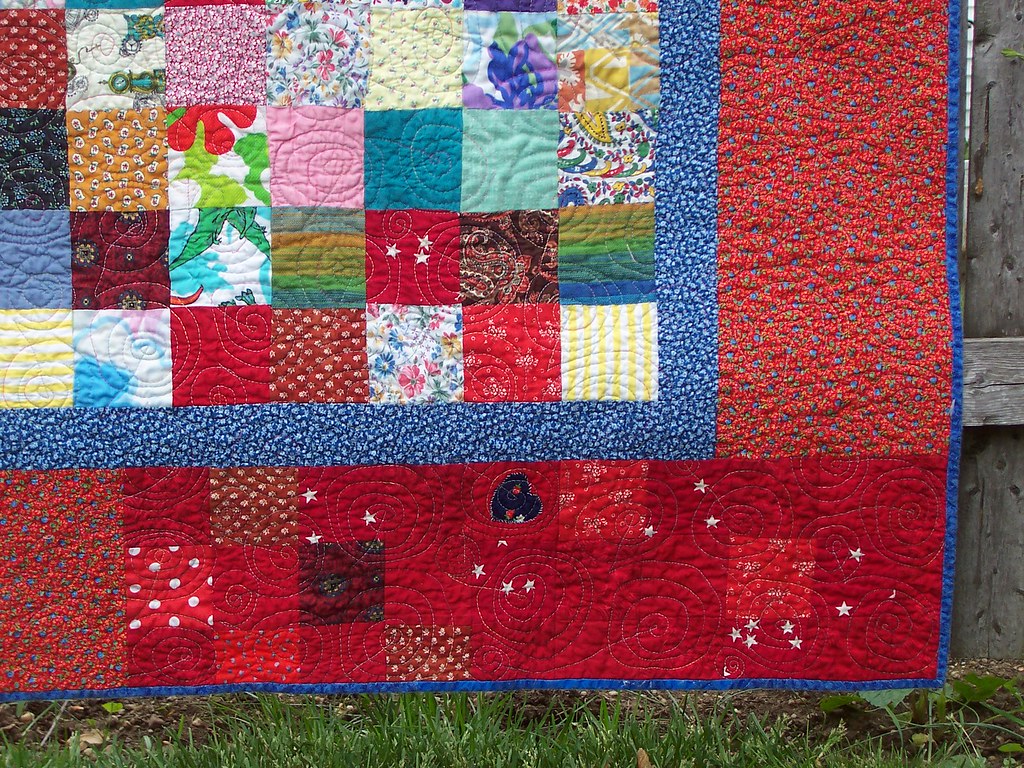
Gradually I built up the confidence to try out some quilting on the book project, and hey, it didn't turn out too bad.  (You can see it better on the back-- and don't mind the broken threads.. sometimes my top thread catches on the feed dogs, even though they're down, while FMQing.  I should take it to be serviced, right?)

 I tried a vine, zigzags, spirals, even George's name... and honestly, each pattern just made me want to go back and try out some more. I was totally surprised that of all I tried, the square spirals are the ones I liked doing the best.  I've been daydreaming about quilts with thin borders ever since..
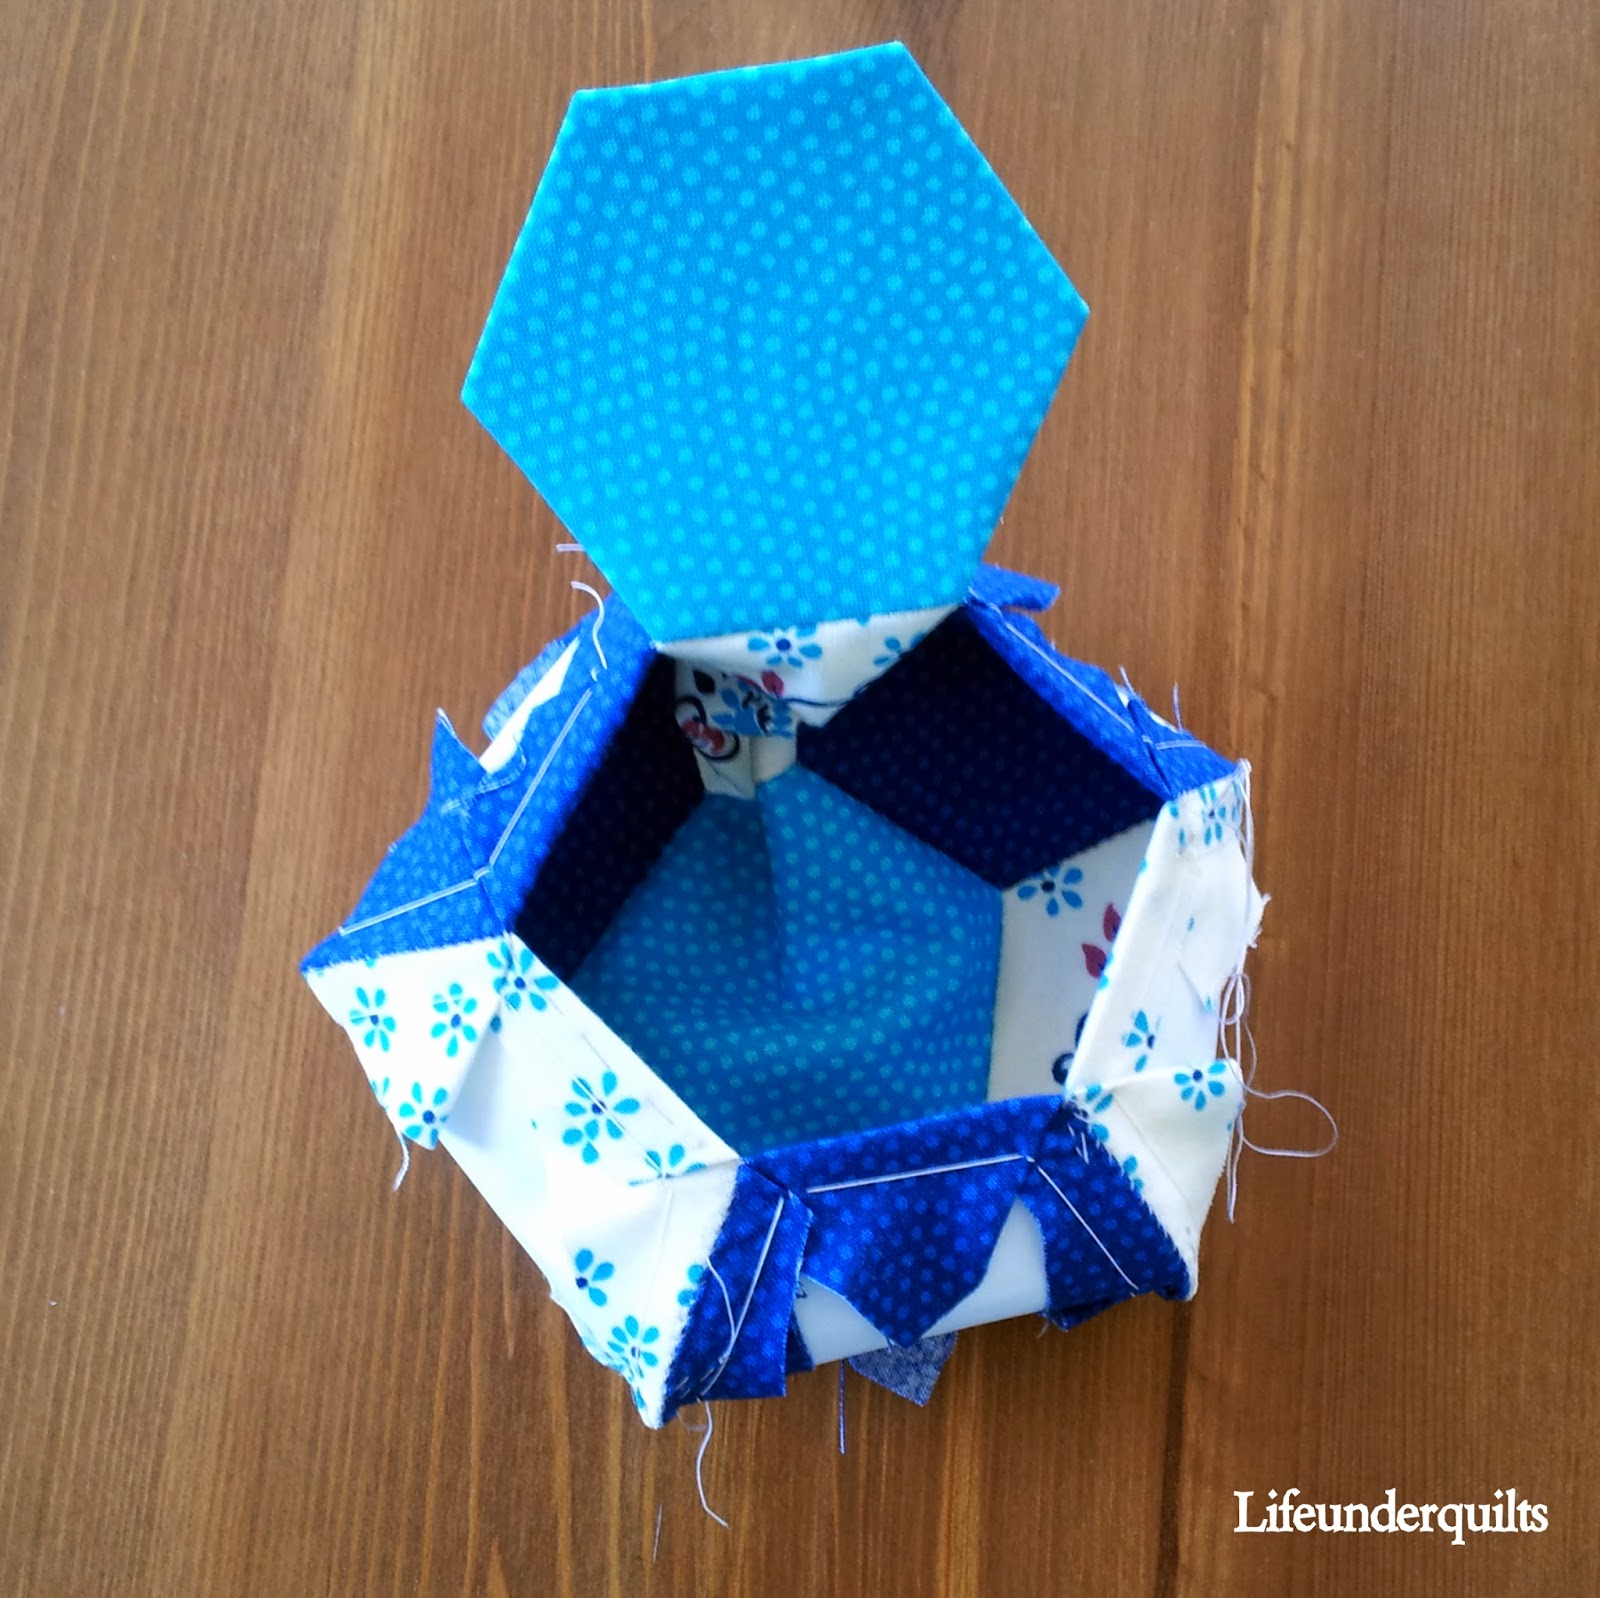
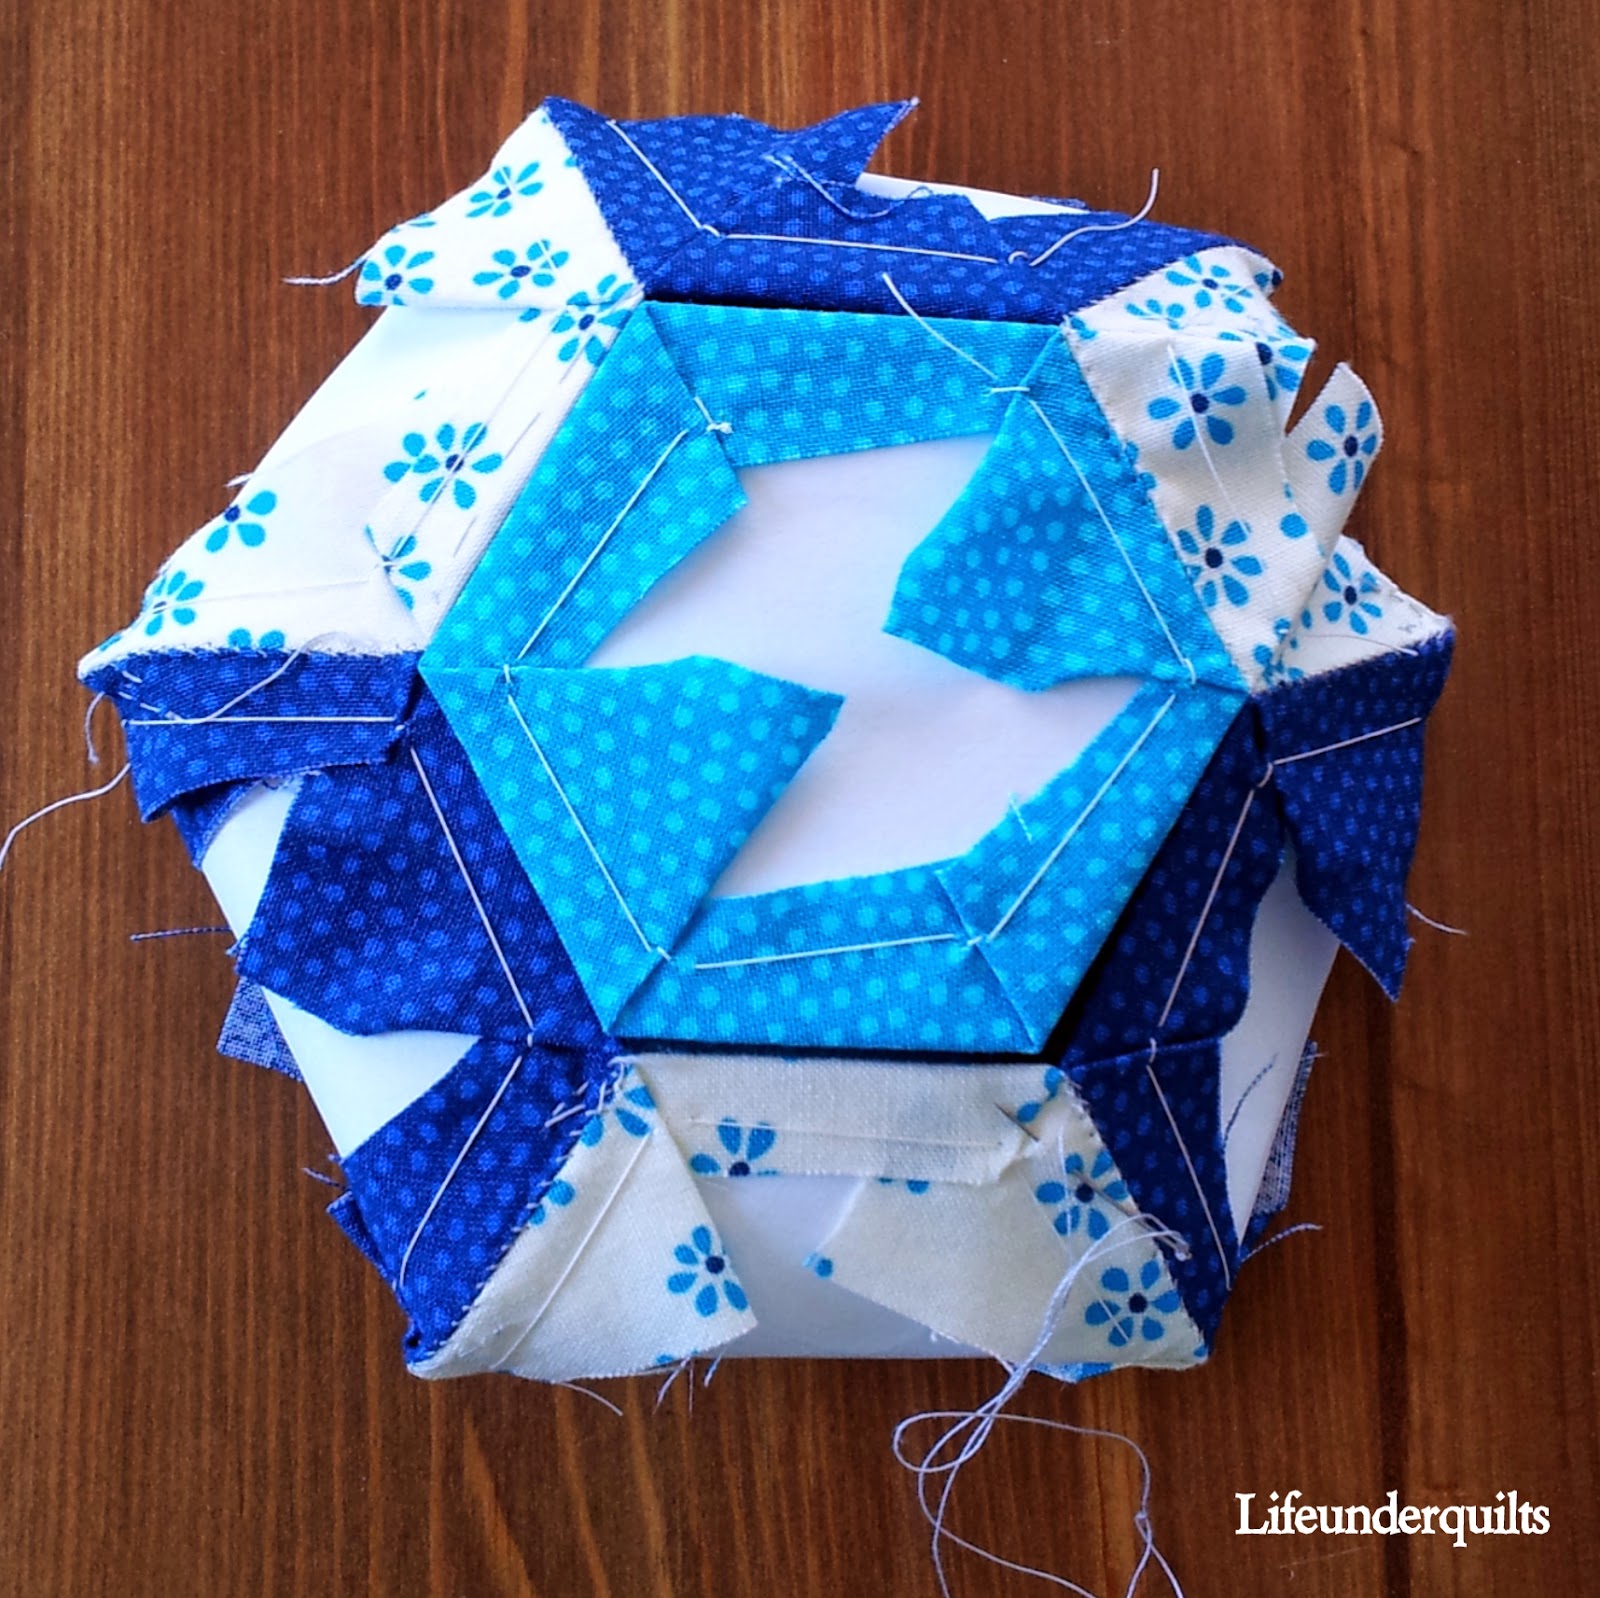
So here it is:  I made a little chair cushion for George's play table chair.  He was super excited about it, and so was I.  (Christina's pattern is for a regular sized chair, but I adjusted it for George).
Are you like me, a fake free motion quilter?  Are you scared, or don't know where to start?  This book is great for walking you, step by step, past that fear and into a place where you can start to get creative with your needle.  Most of the 24 projects are small and fast, so you can try out a bunch of different designs and techniques and add skills quickly.  Soon you'll feel confident enough to quilt your own quilts with enthusiasm instead of anxiety.  Quilting should be fun, right?  I also love that all of her practice projects end up being cute little items perfect for gift-giving.  I hope I'll find time to make a few more before Christmas..

If you would like to win a copy of First Steps to Free Motion Quilting (a US winner can choose between a hard copy and an ebook, an international winner will get an ebook.), leave me a comment telling me the last thing you wrote by hand, the last thing you ate, and the last person you talked to.  I'll choose a winner on Monday, 9/30. 

And don't forget to stop by the rest of the stops of the tour for more chances to win!
9/25: Allison Rosen at Stash Books Blog 
9/26: Jessica Alexandrakis at Life Under Quilts  (you're here!)
9/27: Monica Solorio-Snow at Happy Zombie 
9/28: Susan Beal at West Coast Crafty 
9/29: Kathy Mack at Pink Chalk Studio 
9/30: Angela Walters at Quilting is my Therapy 
10/1: Amanda Jean Nyberg at Crazy Mom Quilts 
10/2: Megan Dye at Megs Monkey Beans
10/3: Victoria Findlay Wolfe at Victoria Findlay Wolfe Quilts 
10/4: Katie Pedersen at Sew Katie Did 
10/5: Christina Cameli at A Few Scraps

Friday, June 21, 2013

Moda Honeycombs for EPP

Have you seen the pre-cut hexagons in fabric shops?  Seeing as hexies are all the rage (and have been for some time now it seems), it really isn't surprising that manufacturers have started laser cutting them for our convenience.  Moda makes nice stacks called Honeycombs.  You get 40 per pack and they measure 3" per side.  They come with a piece of template plastic with holes to mark seam allowance, which is great if you plan to stitch them by machine, but I took one look and had other plans..

Moda was nice enough to send me some Honeycombs to play with and today I'm going to share a little tutorial for how to use the Honeycomb pre-cuts for English paper piecing.

A Honeycomb can be cut into the following EPP shapes and sizes:
2" equilateral triangles
2" 60-degree diamonds
1" (short side) kites
2" half hexagons

Depending on the seam allowance you prefer, you can change them up a bit to suit your comfort level.
I happen to be a huge fan of 60 degree diamonds, and if you cut up a Honeycomb, your diamonds come out to exactly 2 5/8" high-- perfect to baste around a 2" template.

So let's cut  some.
First, layer two print Honeycombs.

 Next, place the plastic hexie template (the one that comes with the fabric) so that 1/3 of the hexagon is covered.  Carefully align the corners.

 Here you've got two options-- either draw a line around the template and cut with scissors, or go at it with a rotary cutter (carefully though, a fresh blade can slice through the template plastic)


 Your cut may go a bit further than necessary, but that's not really a big deal.  Slide the cut diamonds out of the way, reposition the template, and cut again.

Now you have 6 cute diamonds, ready to baste to your EPP templates.

 The next step is to secure fabric to your templates with paper clips.

Fold in and baste around the edges with 5 backstitches, taking additional bites of fabric along each side.  Do not stitch through the template paper!

Whipstitch your diamonds into a star!

I'm going to turn these into a pillow.  What can you make with Moda Honeycombs and EPP?

Check out my book for more pattern ideas, and get ready to stitch outside this summer!

And so concludes the Quilting on the Go Blog tour.  Thanks to all the great bloggers who participated and thanks to you all for travel stitching with us~  If you haven't already, head over to Lucy's blog to enter the giveaway and don't forget to use the 20% off coupon UNDER20 at Paperpieces.com!

(p.s. this tutorial is cross posted at Moda's Cutting Table and Potter Craft's Crafternews, make sure to pop over there too and say hi~)

Wednesday, June 19, 2013

Fitting EPP into a life with kids

Last week Christina asked how I manage to get sewing done when the kids are awake. Yesterday was a perfect example.

I set the kids about coloring stained glass pictures (markers on vellum) and once they were set, they barely noticed that I was stitching next to them.  We were able to chat and comment on each other's artwork and everyone was happy and occupied for a while.

I think the key here is to be prepared.  Not only do I keep my travel sewing kit in my bag, but I usually have a project or game for George to occupy himself with should we find ourselves with time to kill.  If I don't plan ahead and bring something for him, he usually gets to play Angry Birds on my phone, but it's much nicer if we can do something separately but still be together.  (Give him that phone and he zones out pretty bad).

The blog tour continues with Ara Jane today, make sure you pop in and tell her what you've been stitching~

Tuesday, June 18, 2013

Beach sewing.

Finally!  the stars aligned, the baby was sleeping, and I got to relax and sew on the beach!  Now my vacation is perfect~
(the white thread is me holding the needle and the phone as I took the picture.  Had to act fast, it was windy..)

The blog tour is over at Katy's today, I hear she's got some music recommendations for us..

Hoping you get to do something that makes you happy today.

Monday, June 17, 2013

Birthday twins with Lucy of CharmAboutYou

Did you know that Lucy and I were in labor at the same time back in January?  Thanks to my internet addiction, I knew this and almost emailed her on my phone from my hospital bed to see if she had the baby yet.  So Jack and Lois are birthday twins and it has been really fun keeping up with Lois on Lucy's blog.  I wonder if we'll ever get the two of them together...
Jack at almost 5 months~
The tour continues at CharmAboutYou today with a fresh giveaway of Quilting on the Go.  Hurry over and comment to enter!!


Sunday, June 16, 2013

Travel inspiration and Laura of Quokka Quilts

Last fall, Laura did this great blog hop where you took color inspiration from photographs and then made EPP projects from them. (you can see my post here)

I played around with a lot of photos to try to get colors I wanted to work with before cutting into my fabric (I think that's not what she intended, but it was fun anyway).. here is one from our trip to Paros last year:
  
 Greece has really great color inspiration, don't you think?  If only I had time to stitch all the quilts I'm inspired to make..

The blog tour continues over at Quokka Quilts today.  Hop over there to read more about how Laura travels with her EPP.

Saturday, June 15, 2013

Cover Girl

Nicole sent me this photo earlier this week and gave me permission to share it.  This is the quilt Nicole is stitching on the cover of my book, and here it is all completed and it looks like it gets a lot of use too!  (I know, hard to focus on the quilt when there's such an adorable little girl sitting on it)

Is there anything better than seeing a picture of a quilt you made being used?  Actually becoming a part of someone else's daily life?  I once got a Christmas card with an entire family sitting on the couch and one of my quilts peaking out from beneath them at the corner.  Best. Card. Ever.

The Blog Tour continues over at Crazymomquilts today.  Hope you are enjoying all this talk about EPP, I know I am.

Friday, June 14, 2013

Blog Tour Day 4-- Victoria at BumbleBeans

When I die, I want to go live in Victoria's scrap bins.
George sure had fun in them at Victoria's retreat in 2011!

But until then I think I'll keep making scrap quilts and blogging about them.  (plenty of Victoria's scraps made it into projects in the book, btw.. p. 58, p. 63, p. 71...)

The tour continues over at Victoria's blog today.. if you haven't browsed around her site lately, take some time to do that-- there's loads of scrappy goodness over there.  And if you're looking for a way to harness your scraps (while unleashing your creativity), pick up a copy of V's book, 15 Minutes of Play.  Endless inspiration...

Ok, back to my own book tour:

June 11     Lesly at Stitch Literate           http://pickledish.blogspot.com
June 12     Clare at Selfsewn                  http://selfsewn.blogspot.com/
June 13     Christina at A Few Scraps      http://afewscraps.blogspot.com/
June 14     Victoria @ Bumblebeans        http://bumblebeansinc.blogspot.com/
June 15     Amanda Jean at Crazymomquilts   http://www.crazymomquilts.blogspot.com/
June 16     Laura at Quokka Quilts                http://quokkaquilts.blogspot.com/
June 17     Lucy at Charm About You            http://www.charmaboutyou.com/
June 18     Katy at I'm A Ginger Monkey          http://www.imagingermonkey.blogspot.com/
June 19     Ara Jane at What Ara Jane Loves        http://whatarajaneloves.blogspot.com/
June 20     Kathy at Pink Chalk Studio Blog          http://www.pinkchalkstudio.com/blog/
June 21     Jessica at Life Under Quilts                http://lifeunderquilts.blogspot.com/

Have you used the paperpieces.com coupon yet?  20% off with the code UNDER20
If you buy something, leave me a comment telling me what shape/size templates you're going to try~

Free Zoom Quilt Class, October 20.

    Free Live Online Craft Class Learn to quilt with Jessica Wed., Sept. 9 Tues., Oct., 20, Nov. 9 7:00 – 8:00 pm Sign up now.   Take one or...