I was racking my brain (and sewing room) for something to enter in this fall's Bloggers' Quilt Festival. My Lime String quilt isn't finished yet and I haven't had time to work on much else. Then it occurred to me that I never did a real blog post on Travel Quilt #3, the one that is featured in my book. So, here it is:
I started this quilt in July 2010, stitched the last diamonds by hand in February 2012, and had the entire thing finished in October 2012. I took a few detail shots of my own, but then it went straight on to my publisher for photography for the book. (And I wasn't supposed to blog about it til the book was released!) It ended up on the back cover, which I was really pleased about. This is the third in my Travel Quilt series and the first time I actually wrote on the stars as I pieced them. The full pattern and instructions, including step-by-step photography, is available in the book.
Long arm quilted by the brilliant Shannon Couvillion in Georgia, this is a very personal quilt, a fabric scrap book of where I went and how I spent my time.
Of course this isn't the first time many of you are seeing this quilt. I heavily blogged my progress as I carried my EPP sewing kit back and forth across the globe, completing a few stars at a time. Here's a quick recap of my favorite in-progress photos:
Have you ever quilted on the beach? Would you like to?
I'm organizing an English paper piecing retreat that will be held on the Greek island of Paros in June, 2014. Come enjoy amazing food, perfect weather, relaxing atmosphere and good company as we stitch together in the middle of the Aegean. Check out my "Greek Island Retreat" tab above, or just click here. Registration is open through February 1st, but space is limited. I'd love to have you join me and start a Travel Quilt of your own~
Wednesday, October 30, 2013
Saturday, October 19, 2013
Strings with Lime
I started a BIG quilt last month. I've been posting bits and peeks of it on IG, but I think I'm ready for a real blog post.
I'm making a full sized string quilt in blues, turquoise and lime. These are "my" colors. So much that I just feel sucked into a very happy comfortable place whenever I work on this quilt.
Strangely though, they were not "my" fabrics-- I am making this at the request of a blog reader (Hi, Lisa!!) for her daughter, and together we chose and purchased fabrics online (from Hawthorne Threads, amazing selection!!). Lisa picked beautiful fabrics. Amy Butler, Jennifer Paganelli, Lizzy House. Gorgeous designer fabrics that I never would have even browsed because I have a working-class aversion to designer fabrics (and paying full price for them). I don't know why I have this aversion-- I certainly end up spending the same amount of $ on lesser-known designer fabrics or down-right junk from the sale bins. Maybe it comes from the days of thrift store shopping instead of getting my high school wardrobe at the mall? Anyway, I was surprised at how much I ended up liking these fabrics, and grateful to Lisa for giving me an excuse to play with them.
I'd say I'm more than half way done piecing the 48 blocks and I'd really like to have the top finished to show at the Bloggers' Quilt Festival at the end of the month. Here's hoping the kids start going to bed on time..
Friday, October 11, 2013
Going to Market?
Me? Sadly, no. But this mini quilt from my book will be there, in the Paperpieces.com booth!
The patterns in the back of the book were all just done as samples (except for p. 109, Ayane's star. There's a photo of the quilt on p. 48), so I quickly added borders and quilted it up in time for Market.
I took a few photos of the process, and while it's far from a full tutorial, I thought I'd post them to show how I did it..
* First I cut border strips 4" wide and lined one up with the lines on my cutting mat. Then I carefully placed the freshly-pressed EPP patchwork on top, overlapping the bottom edge of the border. (When you press your EPP, remember to tuck in any seam tails).
* Next I took my ruler and lined up the top of the border strip with the 4" mark on the ruler. I gently pulled the EPP down until the inner points of the edge were aligned with the ruler's 1/2" mark. (Look at the 9 at the center of the ruler).
* Then I carefully pinned the EPP part to the border strip.
* And machine topstitched it into place. This is a view from the back so you can see that 1/2" of the border is underneath the innermost points of the EPP. I do not cut away the excess at the top points.
For this piece, I cut my border strips extra long and mitered the corners. I would have taken photos except I bribed George for quilting time by letting him play Bad Piggies on my phone and he was getting tired of pausing the game so I could take step-by-step shots. I was too lazy (and in a hurry) to find the real camera, so this is as far as the tutorial goes. Hope it makes sense. If anyone has questions, just ask.
I am very happy that a little part of me will be at Market this month, and happy too that I have a small finish to link up this week at Crazymomquilts. If you are lucky enough to be going to Houston, enjoy, enjoy, enjoy!! And please post often to Instagram so I can follow along from home!
Monday, September 30, 2013
And the winner is..
Whit September 26, 2013 at 9:07 AM
I just wrote a To-Do list for the day.
Drinking Hot Chocolate now.
And talking to my one year old now too!
Thanks for this great giveaway!
Drinking Hot Chocolate now.
And talking to my one year old now too!
Thanks for this great giveaway!
I've sent you a message!
Thank you so much to everyone who took the time to play along with my silly question entries. It may have seemed a strange request, but I was curious, for the sake of curiosity and also with a purpose. See, recently, my son's school district has decided to stop teaching cursive/script writing. This has made me think. A lot. I was not quick to anger or argue, because I know times are changing and that many things already have changed (Did I even tell you about the time in London when we passed a red phone booth and I had to explain to George what it was for? Or when I told him his grandmother didn't have computers when she was a kid and he said in shock, "Not even a touchscreen!" Ahh.. things have definitely changed).
But I have sought out discussions and opinions on the topic, on Facebook and in real life, and I'm slowly working through how I feel about this monumental difference between my life experience and those of my children.
Waay back before I was a quilter, I was a writer. Not this kind of writer, a blog writer or a book writer, but a letter writer. I had lots of pen pals, tons of stationary and pens (and stickers, and stamps, and any other office supply I could get my hands on). I may have written about this before at some point, but here I want to record my feelings on handwriting. On how important it is. How much of an identity marker it is to me. When I see my grandmother's script, I can hear her voice. My mom's-- I envision her hands. (Funny, my husband's handwriting evokes his accent) My own handwriting is something that I spent years refining, and just remembering the pages I have filled with it brings me some sort of comfort and calm, not unlike looking at my own quilts.
I assume that my boys will both learn to write-- to print with pencil and paper-- of course. But will their handwriting become something that will identify them? Will they take pride in it? Will it reveal bits of their personality?
In the discussions, people say that cursive is outdated, unnecessary. But if they don't learn to write it, will they still learn to read it? I can't imagine a world where my children won't be able to read the notes I've written them in their baby books. Where transcriptions will be necessary to read primary sources and other documents that are less than decades old? Yes, this is getting emotional for me.. sorry. One friend directed me to this website on the subject, and it gives more to ponder. I think there's more to cursive writing than the school district is paying attention to..
So I asked, what was the last thing you wrote by hand. The majority of people said some sort of list, either a to-do list or a grocery list. Lots of people wrote notes or cards. Many of you wrote checks. One person commented that she wrote in a journal. A real paper journal. That's good. I have a paper journal too, one that I occasionally jot down what the boys and I do with our days-- funny things they did or said, Jack's baby milestones. I have a notebook of lists and ideas too that gets used more often. But the last thing I wrote was my signature on a credit card receipt at the quilt shop. (The last thing I ate was a ghost shaped marshmallow).
Anyway, I've always been a fan of material culture, and I just wanted to use this space to record how I feel about this cultural change. I worry that they won't teach cursive and then in 10-20 years they'll discover that it was a mistake, that it actually is important and we'll have a generation of people who are lacking this skill-- kind of like how they stopped teaching Home Ec. in high school and now my generation can't cook or feed itself healthy foods and so many other essential home-related skills are just missing! Ok, no tangents.
I'll leave you with some pages of Slams. These are small booklets that penpals passed to each other and answered questions written inside. When the pages were full the book would be sent back to the maker (or the person it was made for) to read, laugh, save.. just a bit of material culture, handwriting included.
Friday, September 27, 2013
My favorite quilt
There's a party going on over at Mary's blog.. she wants to see our favorite quilts. I like a lot of the quilts I've made. Some that I see every day I'm tired of, and others that I've given away I've almost forgotten about.. but there's one that I'm happy to catch glimpses of every time I walk through the house. I'm happy to make George's bed every day. The Spider web is my favorite:
I made this quilt for George, with George, in 2010. I love so many things about it, all the memories, all the fabrics.. The light blue background was a Ralph Lauren shirt of my husband's. The deep blue border was a print I found a JoAnn's. Before George was born, I bought baby stuff in greens and browns, the nursery was painted green, his baby quilt was green, blue & yellow.. but after I met him and got to know him.. he's not really a brown kid. He was much more primary colored.. So I made this quilt with red (at the time I really didn't like red, but it kept creeping into my quilts) and blue. He was 2 years old, by the way..
(after that he went through a Red & Grey period, followed by a Green & Grey period, then it was just Grey.. and now that he's in kindergarten, his favorite color is Pink.)
Spider web quilts take a long time to make, so I have lots and lots of process shots..
I foundation pieced the triangles onto a paper my husband had written. And when it was time to remove the paper, George helped.
When the quilt was done (a few weeks after the local annual quilt show, so I didn't get to show it), we used it, and used it, and used it. I think George got tired of the photo shoots, but I couldn't get enough.
When I made this quilt, I was really in my groove . Going back and looking at pictures, I was so into quilting. I mean, I'm still so into quilting, but lots has changed, life has gotten so much fuller.. I finished grad school, went back to work, wrote a book, had a baby, and stopped working again. Now I'm a full time mom. And I mean FULL TIME. Really, I'd like a break. Just half a day to sit in the sewing room and play, or clean, or iron even! So I can look at this quilt and look back on that time.. when things were simpler. Remember the happiness then and enjoy it.
I made this quilt for George, with George, in 2010. I love so many things about it, all the memories, all the fabrics.. The light blue background was a Ralph Lauren shirt of my husband's. The deep blue border was a print I found a JoAnn's. Before George was born, I bought baby stuff in greens and browns, the nursery was painted green, his baby quilt was green, blue & yellow.. but after I met him and got to know him.. he's not really a brown kid. He was much more primary colored.. So I made this quilt with red (at the time I really didn't like red, but it kept creeping into my quilts) and blue. He was 2 years old, by the way..
(after that he went through a Red & Grey period, followed by a Green & Grey period, then it was just Grey.. and now that he's in kindergarten, his favorite color is Pink.)
Spider web quilts take a long time to make, so I have lots and lots of process shots..
I foundation pieced the triangles onto a paper my husband had written. And when it was time to remove the paper, George helped.
When the quilt was done (a few weeks after the local annual quilt show, so I didn't get to show it), we used it, and used it, and used it. I think George got tired of the photo shoots, but I couldn't get enough.
A note about the quilting... it was an early attempt at free motion. I did it on my Kenmore. Ripping the papers out had loosened a lot of the seams so I wanted to quilt it densely for strength. My lines are wobbly and uneven, but I kept going and quilted it with passion. I remember enjoying the quilting process. And now when I run my hand over it when George is tucked in bed, I think, "That was me. I made this." And I'm proud of myself for the effort.
Thursday, September 26, 2013
First Steps to FMQ-- Blog Tour & Giveaway
Do you quilt your own quilts? The last quilt I hand quilted (start to finish) was George's baby quilt, finished in early 2009. Then I sent one to a long-armer, and by late 2009, I was ready to give machine quilting a try. Even though I read a lot of blogs about machine quilting, it was still a rough, bumpy event.
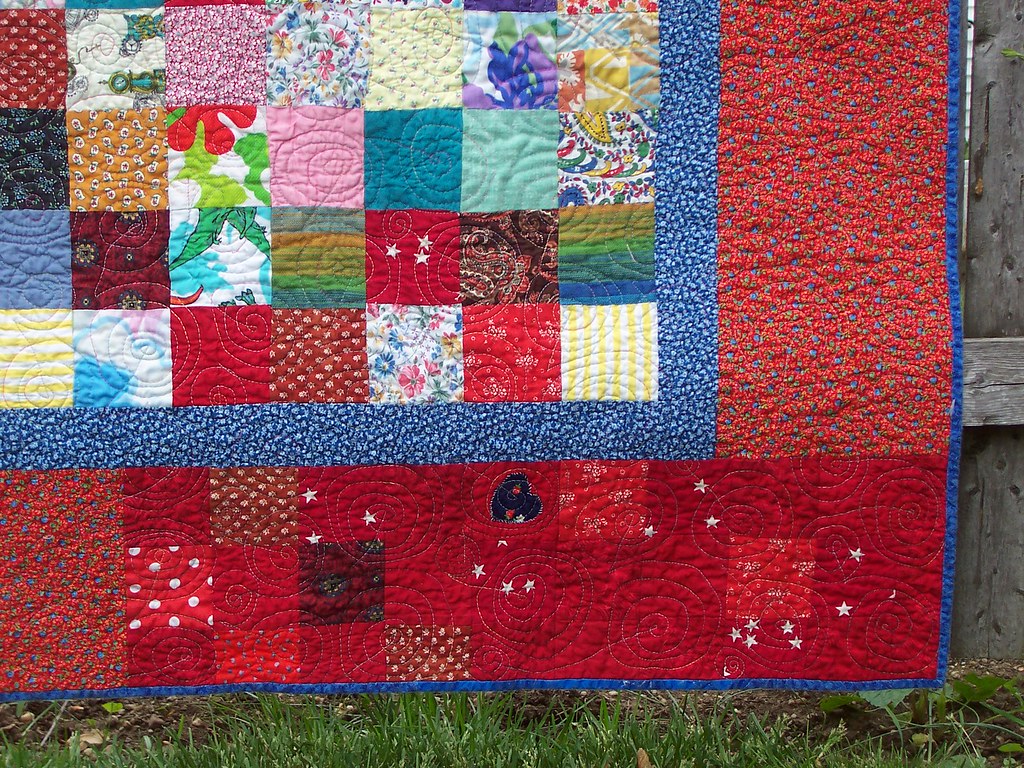
We still use that quilt, but I have learned a lot since. A year or so later, I tried out wavy vertical lines with my walking foot, and that somehow became my 'go to' pattern for any quilt I needed quilted quickly. It's great, I still do it, but I can't really fairly say "Yes, I machine quilt my quilts." Come on, I've got one pattern.
Well, it's time to break out of that one pattern rut and start playing..
My friend Christina has written a book and asked me to help get the word out. When I got my copy I was so excited-- 'Oh wow! I love this!'
'I have that fabric!'
'This looks so cool'
'I love her photography!'
And I'm like, "sure! I can promote your book! I quilt!" I flipped through the book and instantly wanted to make about 6 of the projects. I thought it'd be nice to make one to show off for the blog hop. The construction was simple, so I got started-- pieced the top, layered and spray basted.. and then..
Um. No.
I got too scared to quilt it. Because, no, I really didn't know how (or I should say I didn't feel comfortable) to free motion quilt.
That's when I shelved my blind enthusiasm and opened First Steps to Free Motion Quilting as a guide book, with the intent of learning a new skill. And wow, it worked. There is so much information in this book, all neatly organized, easy to understand, with clear directions that are easy to follow. If you read her blog, you know that Christina has always made machine quilting look easy, but now we know how she does it. ;)
I started with some practice pads and I worked on the patterns I have always wanted to try.
I used some left over Mile-a-Minute blocks and turned them into coasters. I tried vines, pebbles, echoing paisleys, and spirals. Some of my lines looked good, some were crap, but what mattered was that I was no longer scared of doing it. I know with practice I'll get better.
I also started doodling patterns -- I used the magnetic doodle board lying in the play room, easy to draw and erase, no worries about the kids messing it up.
Gradually I built up the confidence to try out some quilting on the book project, and hey, it didn't turn out too bad. (You can see it better on the back-- and don't mind the broken threads.. sometimes my top thread catches on the feed dogs, even though they're down, while FMQing. I should take it to be serviced, right?)
I tried a vine, zigzags, spirals, even George's name... and honestly, each pattern just made me want to go back and try out some more. I was totally surprised that of all I tried, the square spirals are the ones I liked doing the best. I've been daydreaming about quilts with thin borders ever since..
So here it is: I made a little chair cushion for George's play table chair. He was super excited about it, and so was I. (Christina's pattern is for a regular sized chair, but I adjusted it for George).
Are you like me, a fake free motion quilter? Are you scared, or don't know where to start? This book is great for walking you, step by step, past that fear and into a place where you can start to get creative with your needle. Most of the 24 projects are small and fast, so you can try out a bunch of different designs and techniques and add skills quickly. Soon you'll feel confident enough to quilt your own quilts with enthusiasm instead of anxiety. Quilting should be fun, right? I also love that all of her practice projects end up being cute little items perfect for gift-giving. I hope I'll find time to make a few more before Christmas..
If you would like to win a copy of First Steps to Free Motion Quilting (a US winner can choose between a hard copy and an ebook, an international winner will get an ebook.), leave me a comment telling me the last thing you wrote by hand, the last thing you ate, and the last person you talked to. I'll choose a winner on Monday, 9/30.
And don't forget to stop by the rest of the stops of the tour for more chances to win!
9/25: Allison Rosen at Stash Books Blog
9/26: Jessica Alexandrakis at Life Under Quilts (you're here!)
9/27: Monica Solorio-Snow at Happy Zombie
9/28: Susan Beal at West Coast Crafty
9/29: Kathy Mack at Pink Chalk Studio
9/30: Angela Walters at Quilting is my Therapy
10/1: Amanda Jean Nyberg at Crazy Mom Quilts
10/2: Megan Dye at Megs Monkey Beans
10/3: Victoria Findlay Wolfe at Victoria Findlay Wolfe Quilts
10/4: Katie Pedersen at Sew Katie Did
10/5: Christina Cameli at A Few Scraps
Friday, September 20, 2013
The List
Helen came over for lunch the other day and we were discussing The Modern Quilt Guild and changes in our NYC chapter since it started. We
talked about a lot of things, and I mentioned my habit of getting overly
inspired by blogs, instagram and previously pinterest and Flickr. I said
whenever I start to feel like I'm chasing the crowd, I stop. I try to pull
myself back, and regain focus on my quilts and the quilts I want to be
making instead of just jumping in and making one of the hot patterns of
the day (which I'm not knocking and have done in the past (scrap vomit in 2012, coins in 2009, spiderweb in 2010), they have their place in history and build
skills as well as clear the head. Plus it's fun to be involved in an at-the-moment thing).
But back to the
list. I don't know when it started exactly, but at some point I started
writing down a list of all the people whose quilts I like. The quilts I could stare at for days in blissful
wonder. Susan McCord's vine quilt comes to mind as an example.
Helen was surprised to
hear who was on my list, I guess because the quilts I've finished don't
exactly show these quilters as influences. See, I didn't say "my quilts" there, because my collection of unfinished quilts probably gives a
better picture of my personal influences and aesthetic. So many of the
quilts I've tried, I've loved, I've poured myself into, never made it to
completion. But when I see myself as a quilter, I see those quilts
too.
This is my List:
Janet (from the NYC Mod Guild)
Debbie Steinmann (from the ATL Intown Guild)
Charlotta
and of course, my own great grandmother,
Theresa Gleiter
and of course, my own great grandmother,
Theresa Gleiter
![]() |
| Detail of my great grandmother's fan quilt. Yes, she marked her quilting pattern in PEN. |
Are you surprised to learn who's on my list? Do you have a list of your own?
Subscribe to:
Posts (Atom)
Free Zoom Quilt Class, October 20.
Free Live Online Craft Class Learn to quilt with Jessica Wed., Sept. 9 Tues., Oct., 20, Nov. 9 7:00 – 8:00 pm Sign up now. Take one or...
-
Do you quilt your own quilts? The last quilt I hand quilted (start to finish) was George's baby quilt, finished in early 2009. Then I ...
-
What makes blenders so great? It's got to be the color. The deep saturated color, so versatile, so inviting. DREAM, the new line o...
-
I made it, I'm home! I just dropped my bags (didn't even touch the laundry) and sat right down to write my post for the Double Wedd...


